Build Bridge Documentation
Build Bridge
Build Bridge is a simple Windows App that I created to solve the following problems in my build/delivery workflow:
- keeping things organized (where do I put every build? My usual answer was: Desktop. Then I ended up having floating “Windows” folders there, ugh)
- avoid lots of context switching when I needed to bring those builds to a store
- keep my configuration preferences saved somewhere (vdf files, switching to command line tools like steamcmd, then remembering the arguments to pass in: hey wait what was my Itch game name identifier?, and my Steam APP ID? and so on…)
DISCLAIMER
I developed this tool with my own workflow in mind and it’s tailored to my current setup (Windows-based).
But, I would love if other people would find it useful too and in that case I am more than happy to listen for feedback and add/tweak functionality to cover a wider ranges of scenarios.
Also, while I have used it successfully, I cannot exclude lingering bugs here and there.
So, if you want to let me know of any feature idea, UX improvement or simply report a bug, please reach out in one of these places:
- On Itch: you can leave me a comment!
- On GitHub Issues: creating or commenting on an existing issue.
Running The App
Extract the BuildBridge app from the archive and run BuildBridge(.exe).
Prerequisites
Building
- Unreal Engine. Hopefully if you are making a game in Unreal this step should be self-realizing. Build Bridge uses RunUAT to build your project.
Publishing
For Steam:
- SteamCMD
- SteamGuard: you will have to authorize publishing the build from your phone.
- An APP ID and Depot ID ready for publishing.
STEAMGUARD 2FA. SteamGuard with confirmation on your Steam Phone App is the only currenlty supported 2FA method. If your account is protected by 2FA you need to confirm the login on each upload.
For Itch:
- butler: this command line tool is used to manage uploads.
- A valid Itch API KEY for butler to use.
- Your project page ready on Itch.
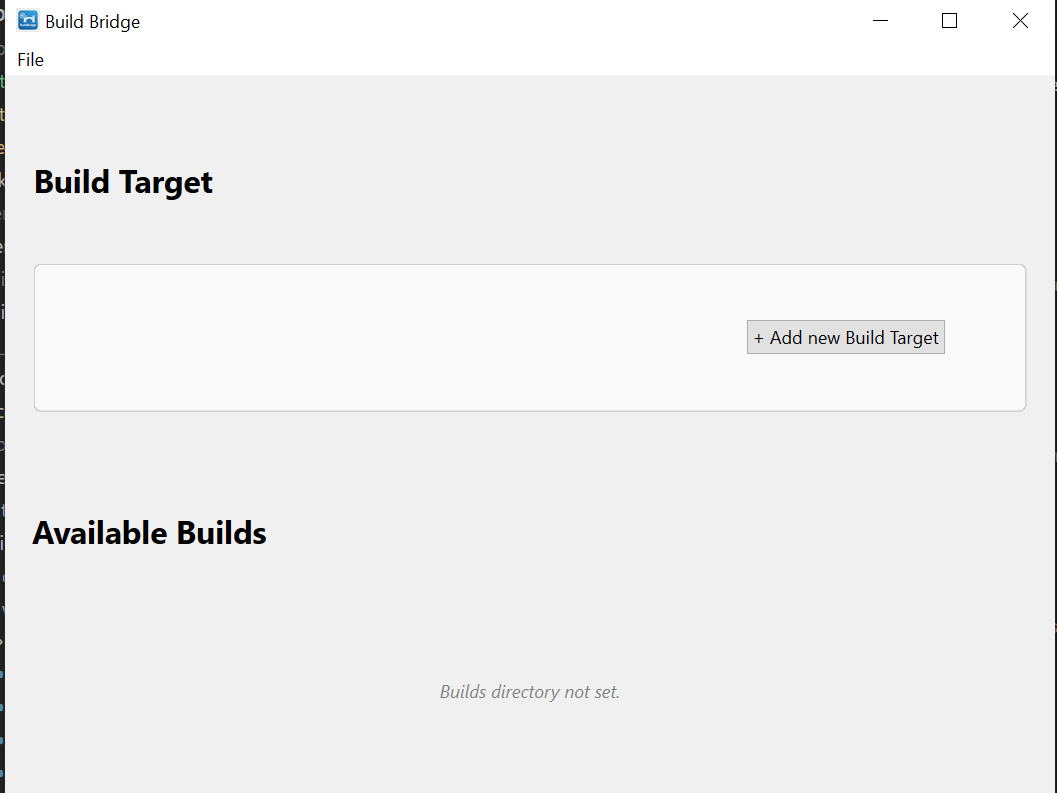
Getting Started
- Add a Project
- This is what you should see if you load the app for the first time:
- To add a Project go to File -> Settings -> Project and add a name (will be used to name the
folder containing your builds).
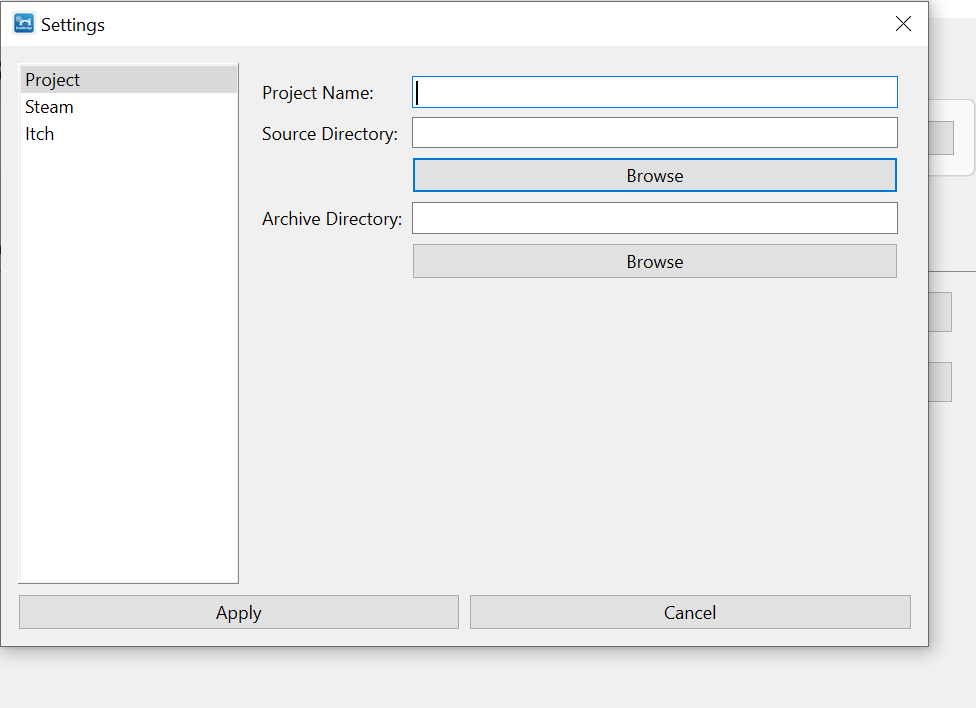
- Set Source Directory: this is the folder containing the .uproject file.
- Set the Archive Directory: this is the root folder where all builds will go.
- This is what you should see if you load the app for the first time:
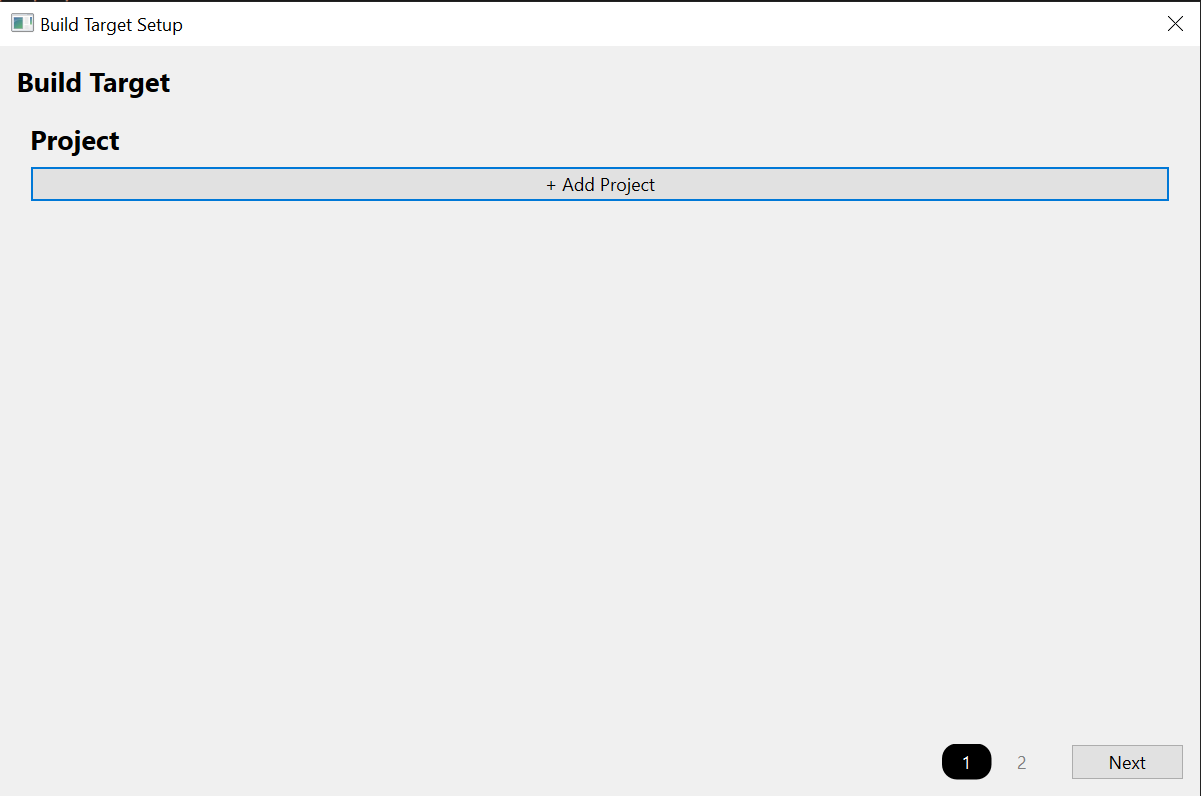
- Configure Build Target
- Click “+ Add new Build Target” or “Edit” to open the setup dialog. If you didn’t create a Project you’ll see a shortcut here.
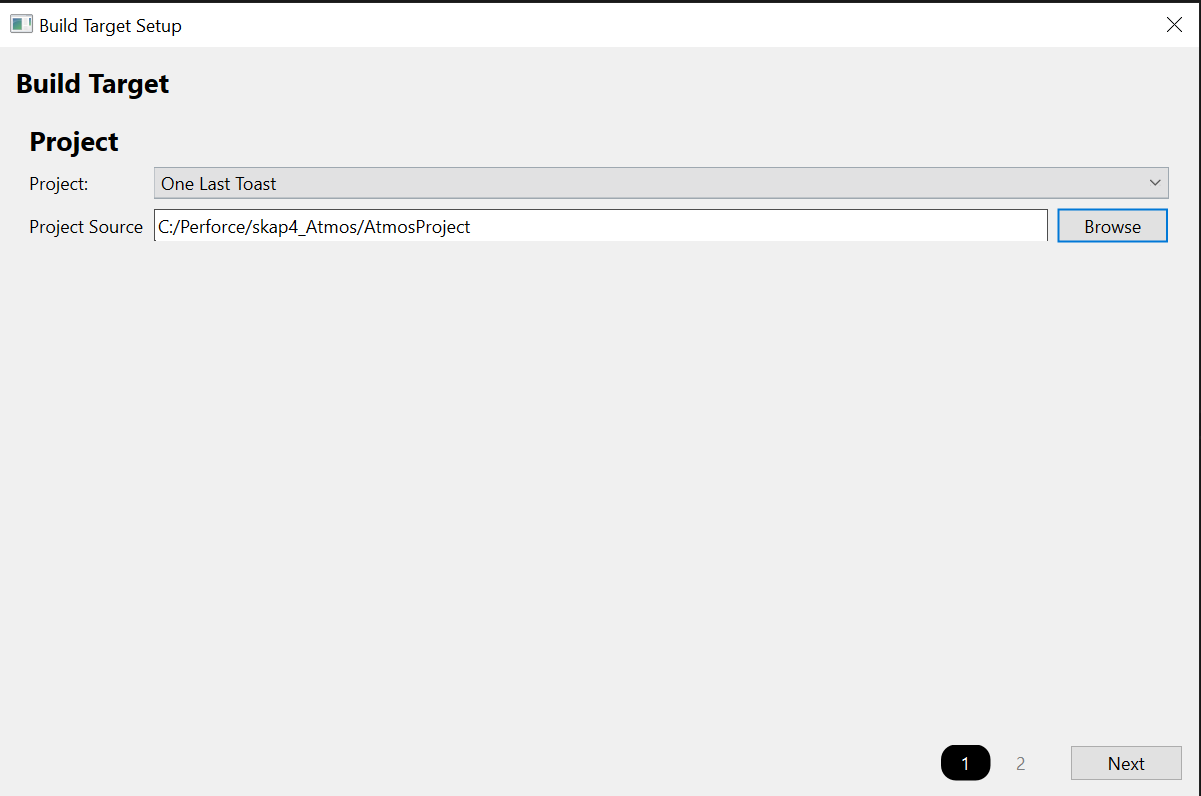
- Select the Project you just created (one day maybe we’ll have multi-project support), verify the Source Directory.
- Set the Build Type (Development/Shipping) and Target Platform (Win64, etc.).

- Save the build target.
- Click “+ Add new Build Target” or “Edit” to open the setup dialog. If you didn’t create a Project you’ll see a shortcut here.
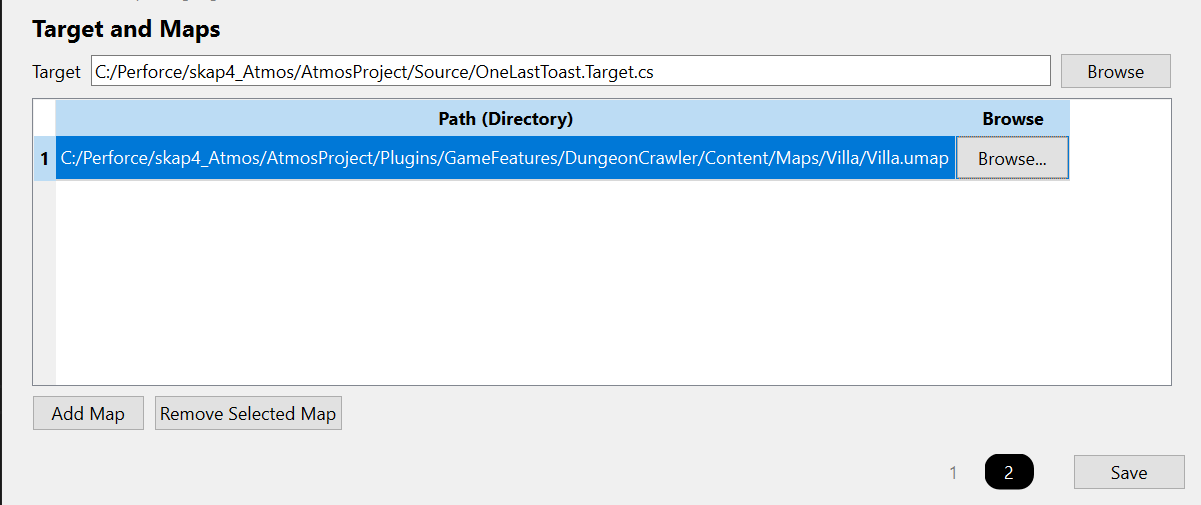
From version 0.6.0 the Maps and Target section was added. This allows you to specify a target and specific maps to be included using the "-map" argument.
- Build
- The build target is now active in the main window.

- Enter a Build Version/Release Name (e.g., “1.0.0”, “0.2-beta”).
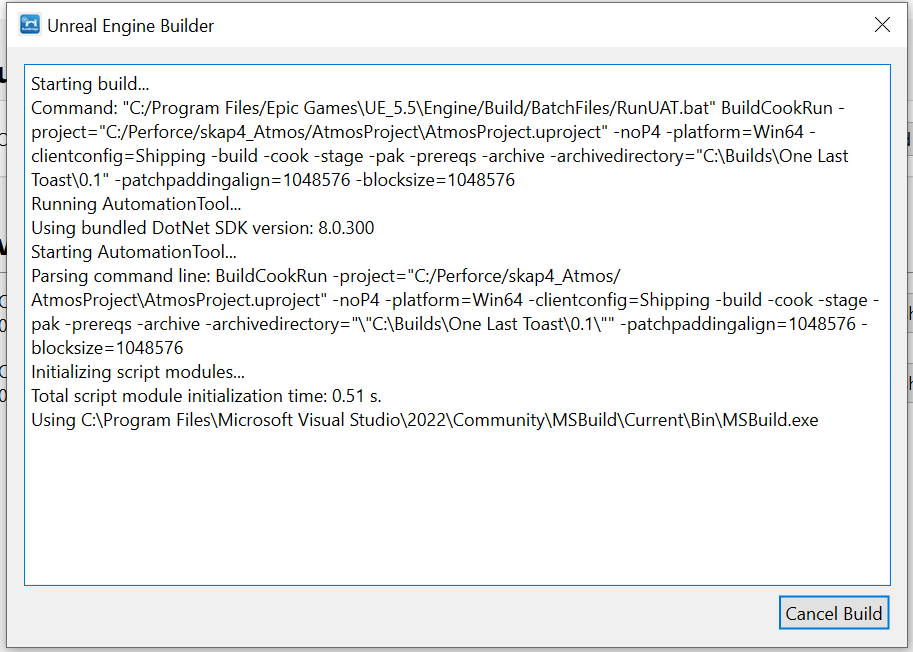
- Click “Build”. A dialog will show the Unreal Engine build process output and output build logs from RunUAT.
- The build target is now active in the main window.
- Publish
- Once the build is complete, it will appear in the “Available Builds” list in a folder named {Project.archive_directory}/{Project.name}/{BuildId}
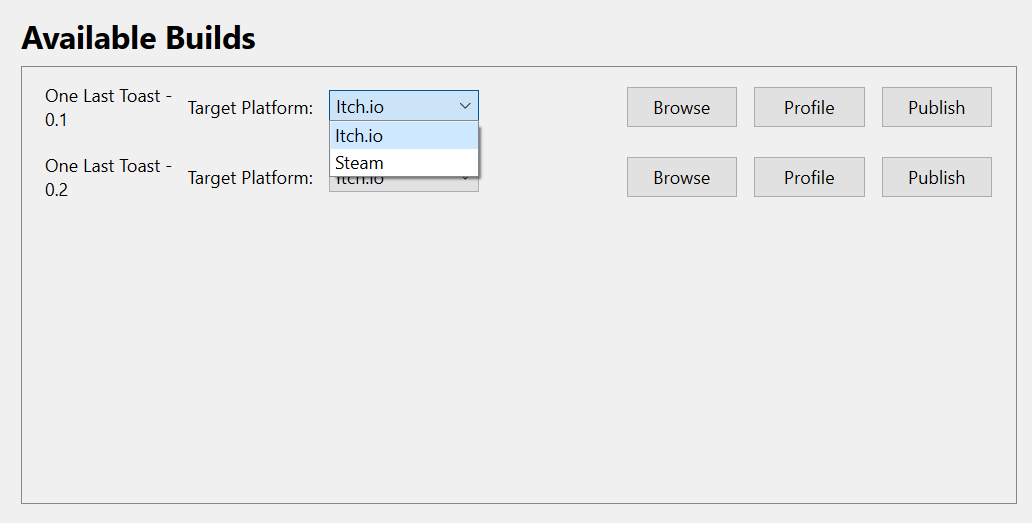
- Select the target platform (Steam/Itch.io) from the dropdown.
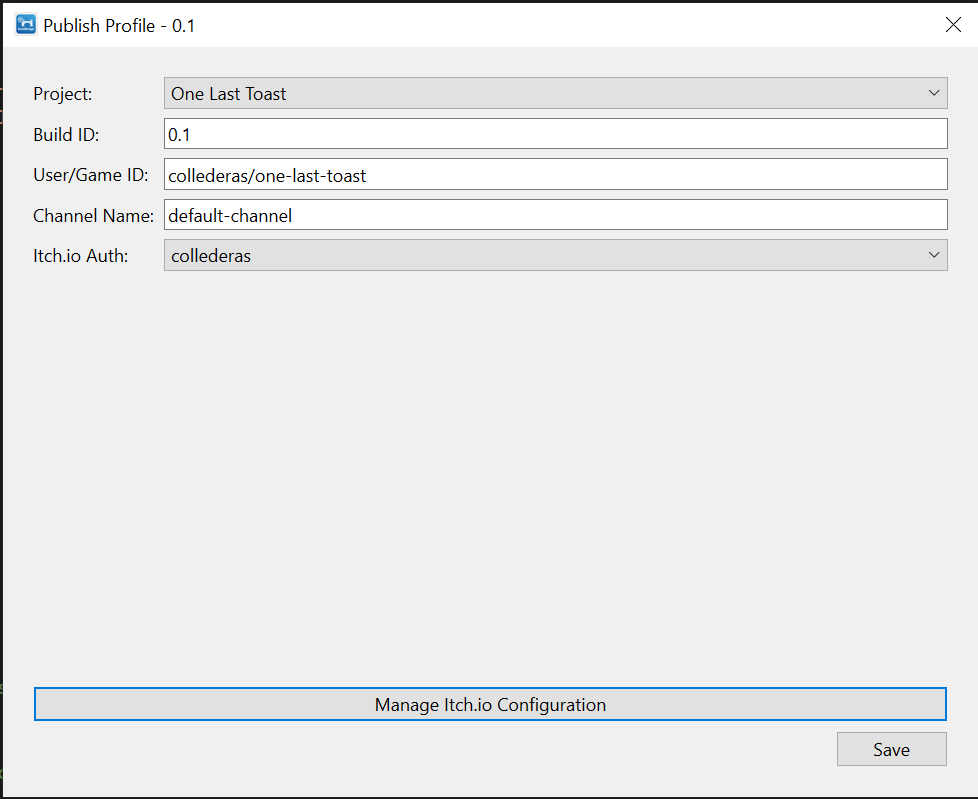
- Click “Profile” to configure the publishing profile for that platform and
build ID (e.g., Steam App ID, Depots, Itch.io User/Game ID, Channel).
You’ll need to have configured the related Steam/Itch.io settings first. See Publishing Details
- Once the profile is configured and valid, the “Publish” button will be
available to click. An upload dialog will show the progress.
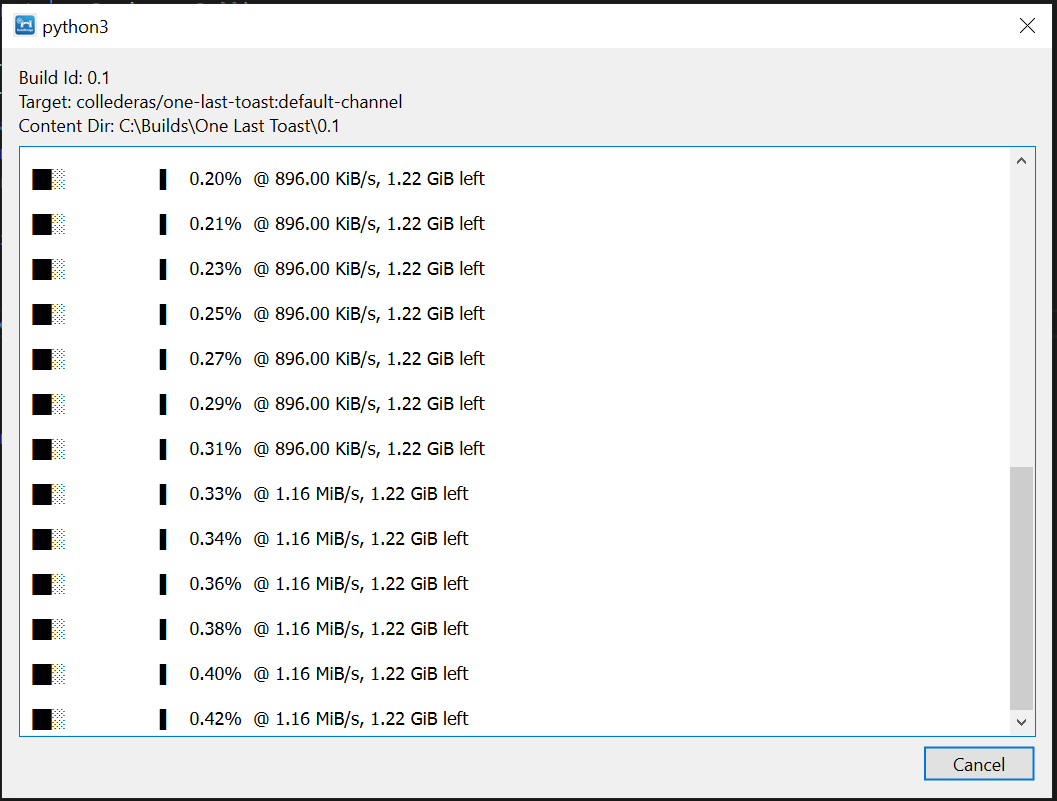 SteamCMD buffers its output so you will see logs appearing with delay.
 - If the “Publish” button is unavailable, hover it and wait for the
tooltip: it should provide you with hints on what is missing.

- Once the build is complete, it will appear in the “Available Builds” list in a folder named {Project.archive_directory}/{Project.name}/{BuildId}
Publishing Details
For now Steam and Itch are the supported stores. Publishing to each requires you to have on your machine a recent version of their respective command line tools: SteamCMD and Butler. See Prerequisites.
Build Bridge needs to authenticate to Itch and Steam so a set of credentials are required. Passwords and API Keys are stored using keyring and not kept in the local database.
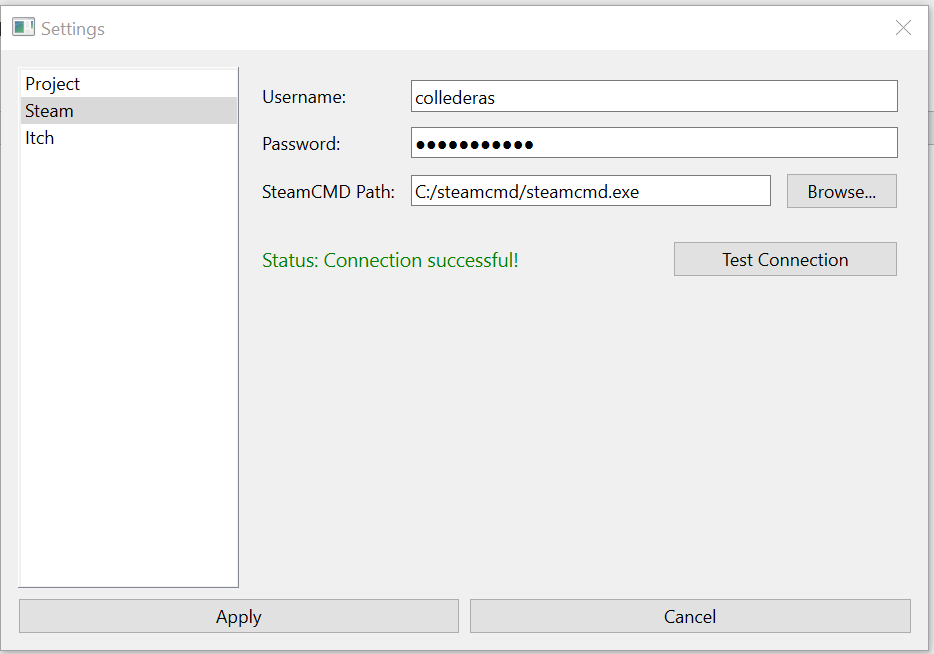
You can configure each Store authentication from File -> Settings
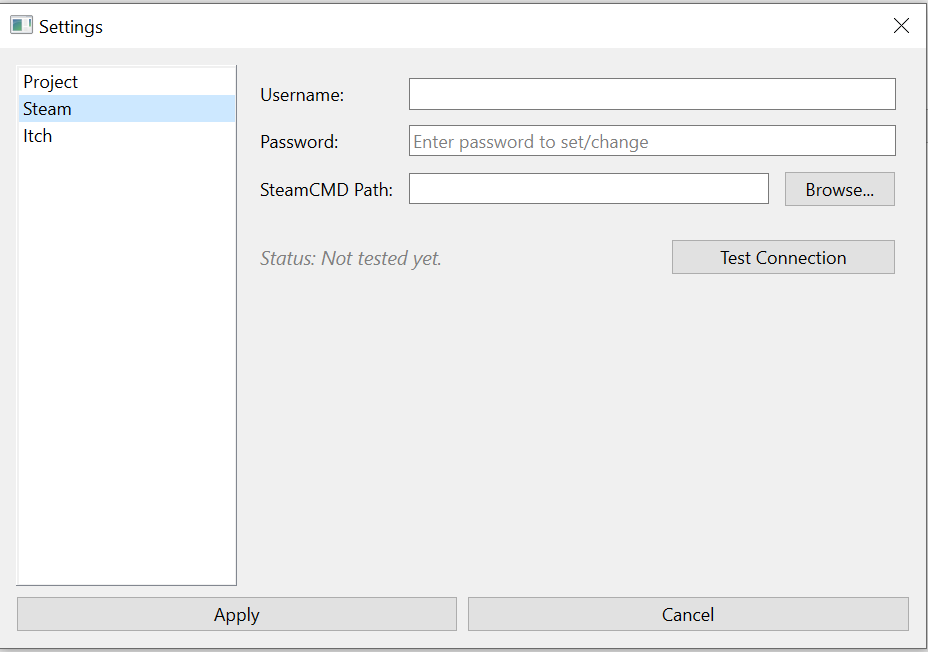
Steam
Authentication
Steam Publishing requires authenticating to the Steam Servers like any other upload. To authenticate you will have to add you username and password to Steam Settings.
STEAMGUARD 2FA. If your account is protected by 2FA you need to confirm the login on the Steam app on each upload. Keep your phone near.
Once you have entered the credentials and the path to your local SteamCMD executable (used to try a login call), you will be able to verify the connection.
If everything goes well, after you accept the access on your Steam app you should see a confirmation message. Else the error will be logged.
Publish Profile
This dialog (Build List entry -> Profile button):
 allows you to specify the fields that will end up in the vdf file.
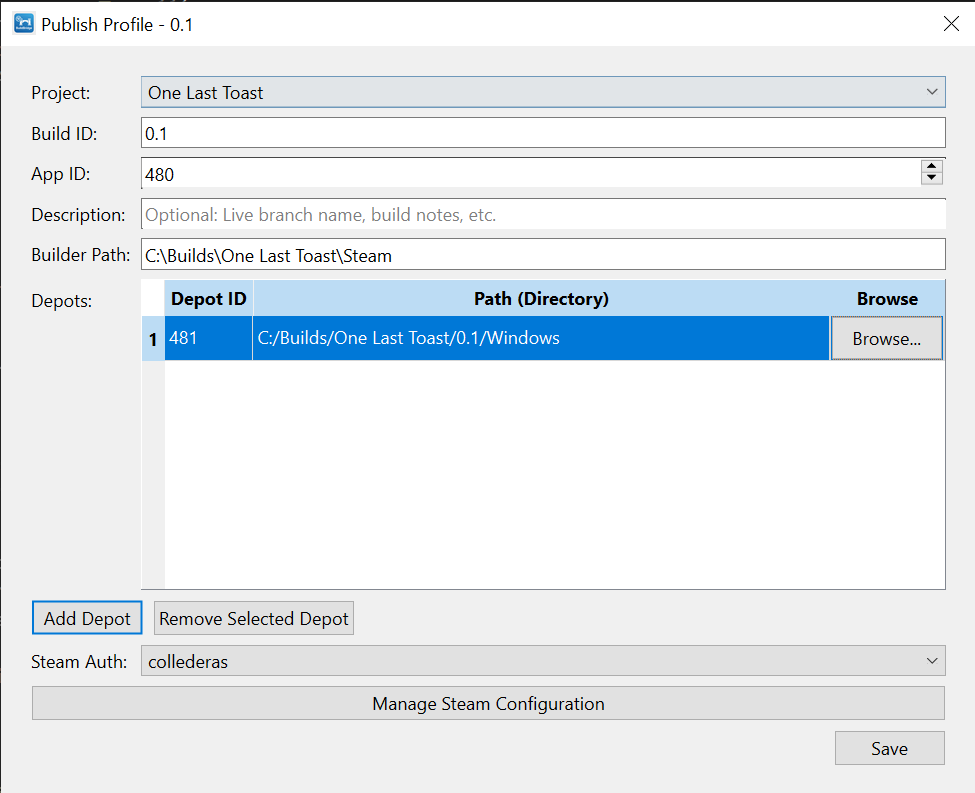
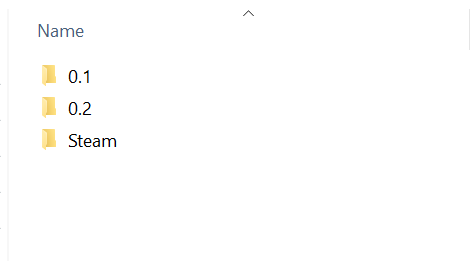
Build Bridge automatically creates the required vdf file, using the single file approach (no separation for depots). It will place the build files in an auto-generated Steam folder in your Project’s Builds directory.
Playtest
In version 0.5.0 support for a secondary Steam Profile was added, to allow publishing on to the Steam Playtest version of your app.
In the Edit Publish Profile dialog, you will find a tab dedicated to the Playtest setup:
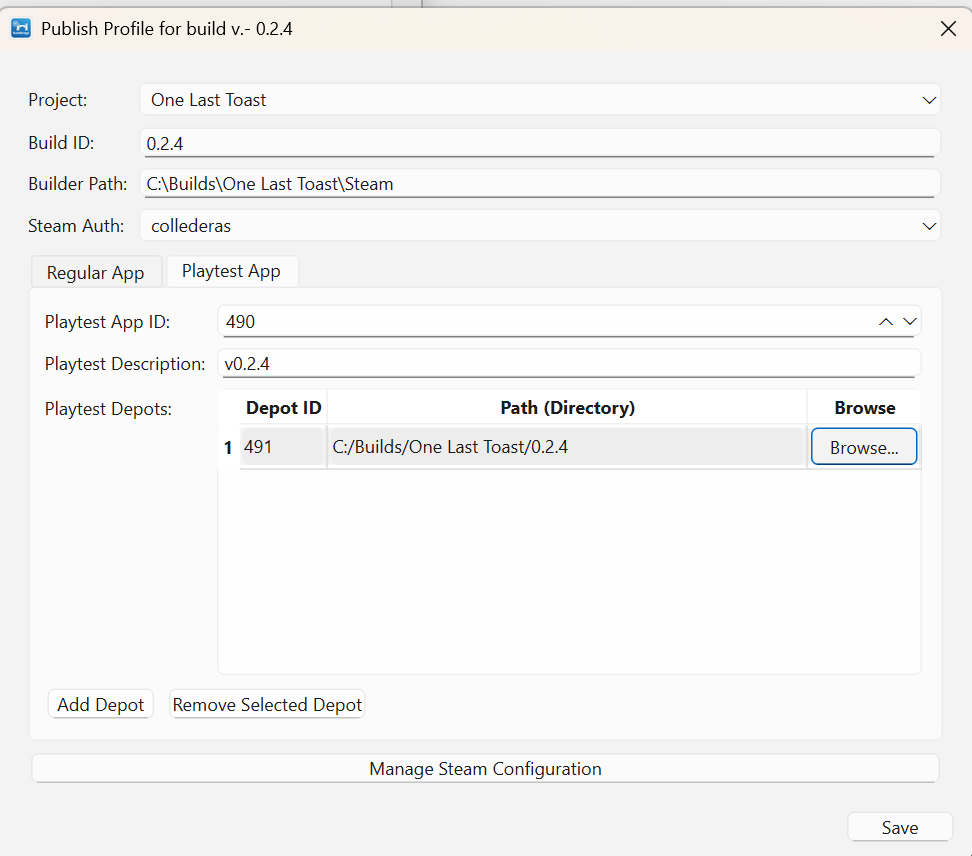
In order to target this configuration when you press Publish, you need to check the related checkbox (available only when targeting Steam)

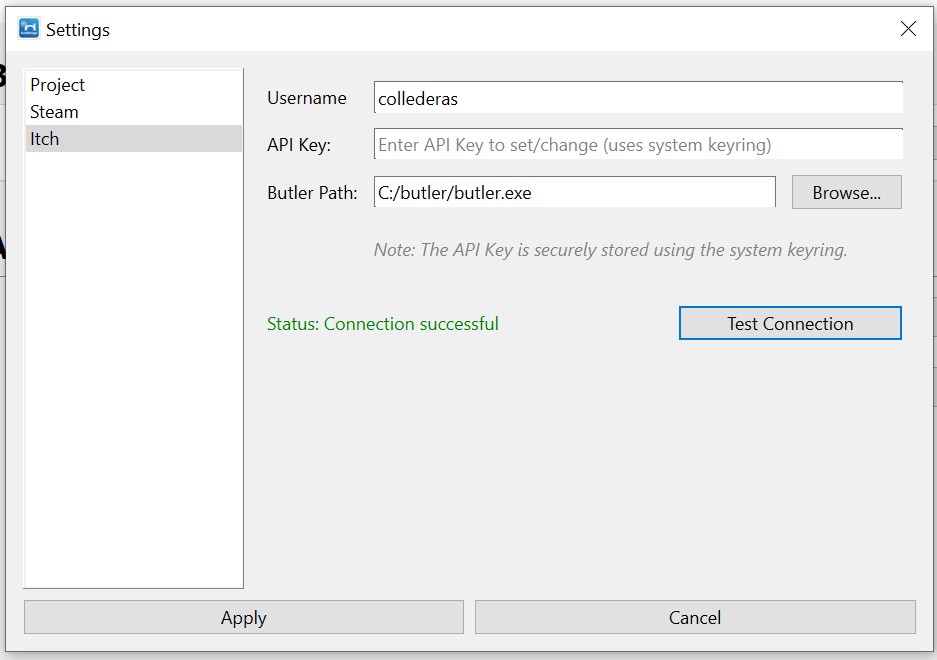
Itch
Authentication
Itch Publishing requires only a username and your API KEY.
You can test a connection without butler (as it is done via simple HTTP API call). But you will need butler to publish anyways so ensure you point to it.
Publish Profile
This dialog (Build List entry -> Profile button) allows you to specify the fields that butler uses to publish the build on your game’s page.
Contact
Questions? Feedback? Bug?
- On Itch: you can leave me a comment!
- On GitHub Issues: create a new issue or comment on an existing one.